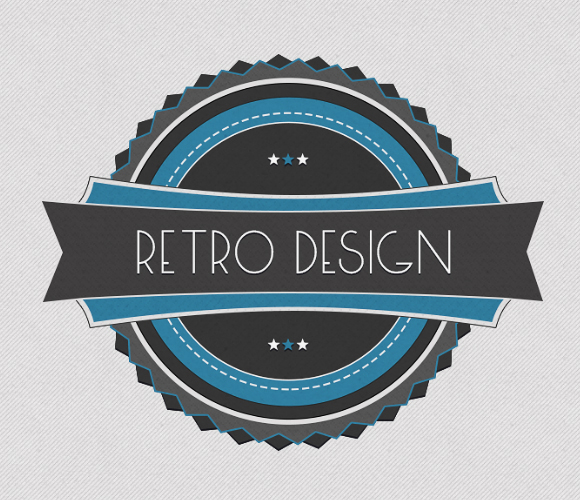
Retro is trending nowadays; you see it everywhere in web design, posters, flyers, logos and of course Badges. We love using badges for drawing attention to specials on landing pages and can help spruce up otherwise boring pages on service business sites. So today we are also going retro and creating an interesting retro badge in Photoshop. Before we start designing let’s see what we need to get this done.
Quick note: If you are struggling with design or need help with branding, our company provides web and graphic design services for our internet marketing clients. Don’t hesitate to reach out if you’d like to discuss a project.
Without further ado
Resources:
Minimal patterns: http://www.graphicsoulz.com/premium-item/free-minimal-pattern-set-vol3/
Final result:
Step 1:
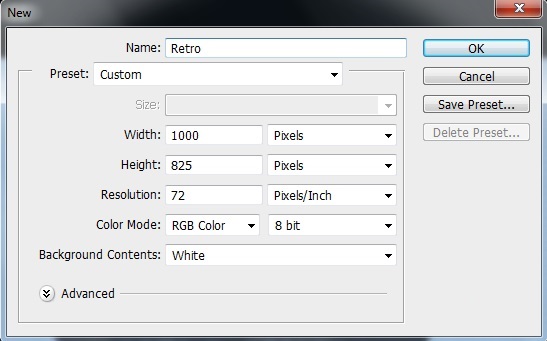
Open Photoshop and create a new file, set the width to 1000px and height to 825px for this.
Step 2:
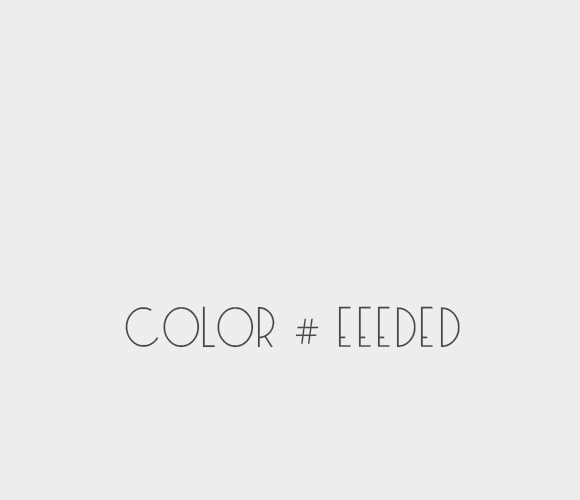
Let’s start with the background, first create a new layer (select the new layer option from the layer panel or click on Layer> New> Layer) and fill it with color # eeeded using the ‘Paint bucket Tool’.
Step 3:
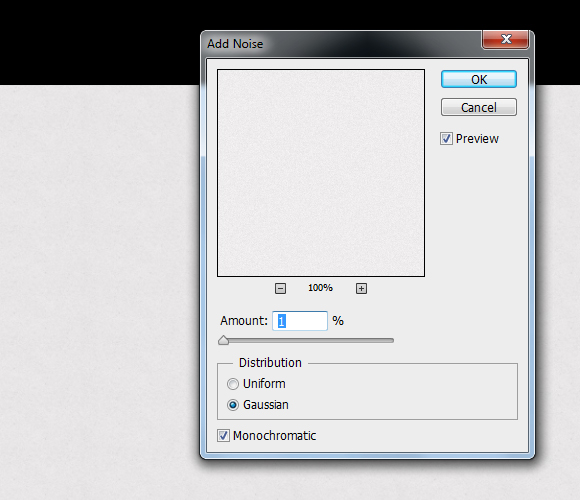
Select the background layer we have created above and click on Filter> Noise> Add Noise. Add 1% noise with ‘Gaussian’ and ‘Monochromatic’ checked.
Step 4:
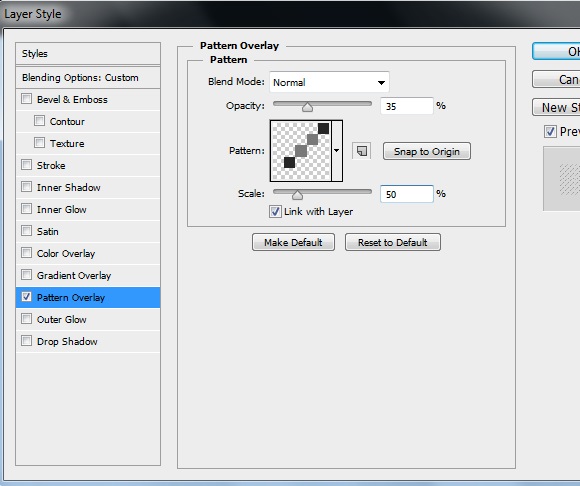
Now click on Layer> Layer style> Pattern Overlay and add a subtle pattern from the set mentioned above.
Step 5:
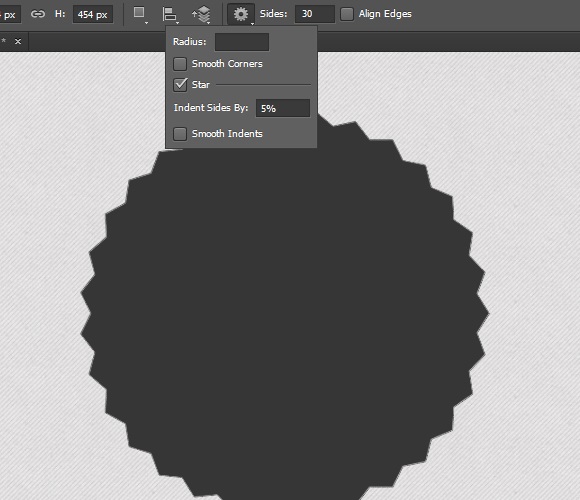
Our background is ready so let’s move on to the badge, select ‘Polygon Tool’ and create a shape with 30 sides. Fill the shape with color # 363636.
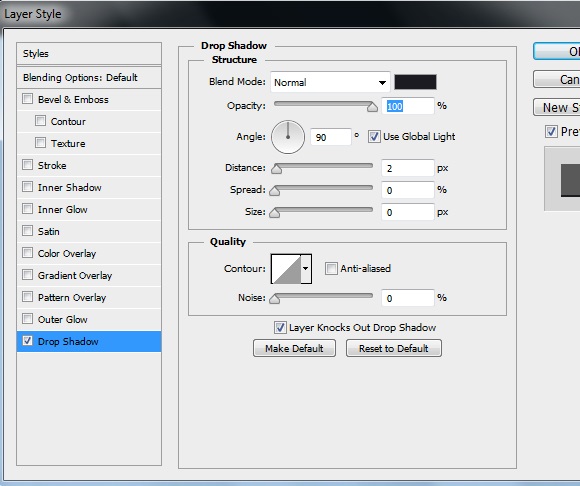
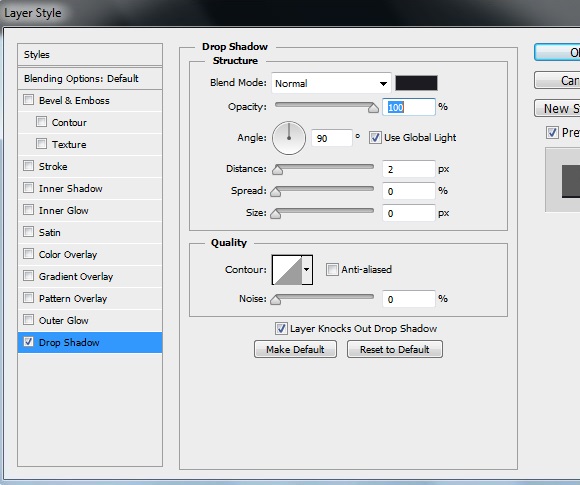
Select the shape and click on Layer> Layer style> Drop shadow. Add drop shadow with the following settings.
Step 6:
Create another shape with the ‘Polygon Tool’ and fill it with color # 555555. This time make it a bit smaller than the previous shape.
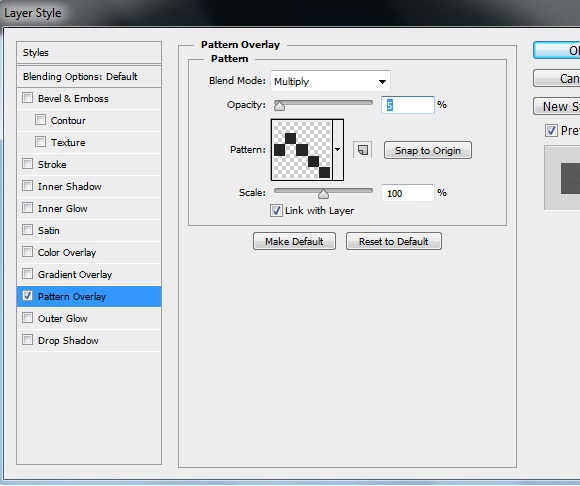
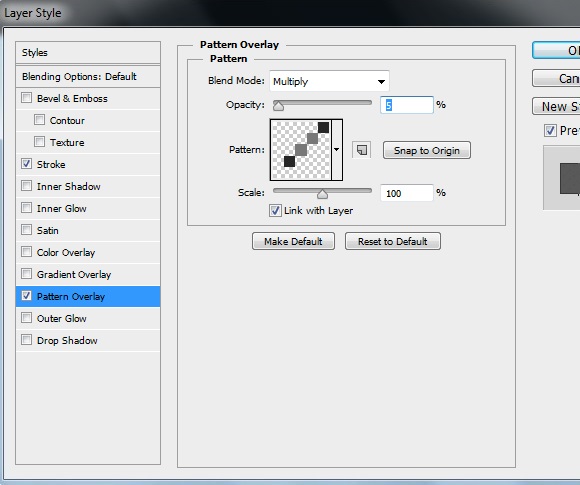
Select the shape layer and add ‘1.49pt’ stroke with color # 317d9f. Now click on layer style to add a subtle pattern. Keep the pattern settings same as shown in the image.
Step 7:
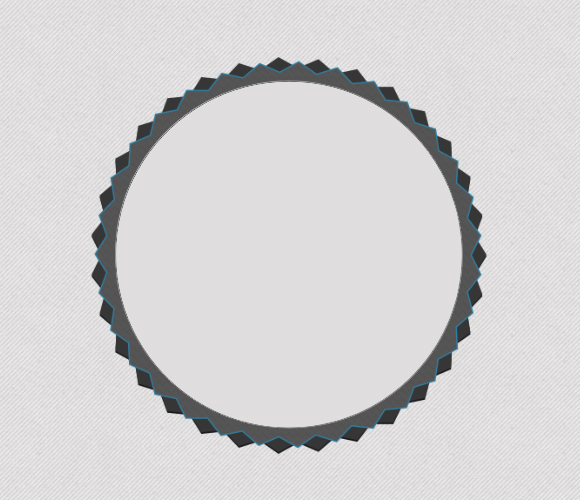
Create a new Layer (Click the New Layer option from the Layer panel) and select ‘Ellipse Tool’ to create a circle in the middle. Fill this circle with color # dfdede.
Step 8:
Add a new circle using the ‘Ellipse Tool’ and fill it with color # 363636. Add ‘1pt’ stroke to this circle with color # 000000.
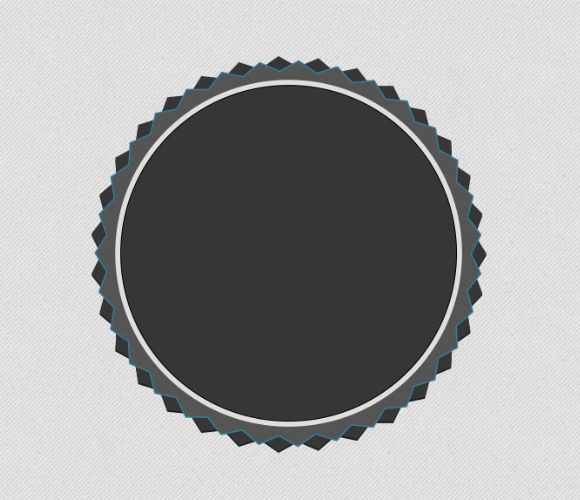
Again add a new circle; making it smaller than the previous one. Fill this one with color # 317d9f and add ‘1pt’ stroke with color # 000000.

Step 9:
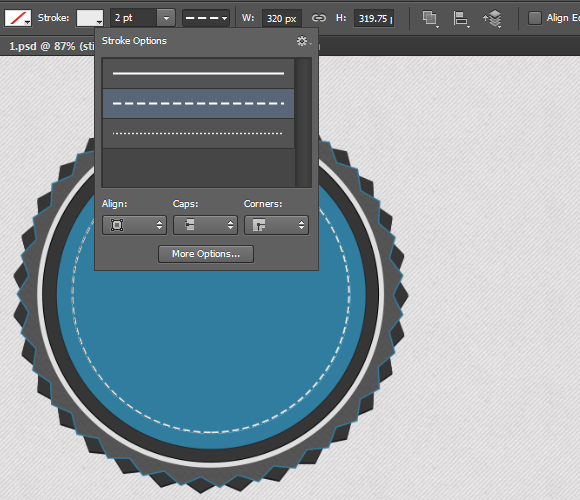
Create a new layer and select the ‘Ellipse Tool’ to create a round shape. Reduce the fill for this layer to 0%. Add ‘2pt’ stroke with color # ebebeb, select ‘Dashed’ stroke from the stroke options.
Step 10:
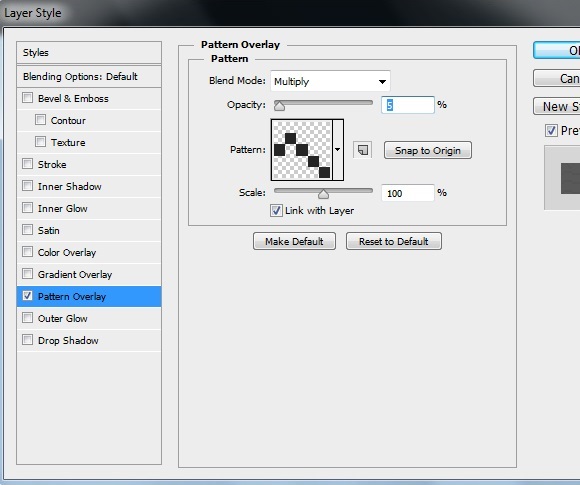
Now create the final circle in the middle and fill it with color # 363636. Add ‘1.49pt’ stroke to the circle with color # f4f4f4. Select the circle layer and click on Layer> Layer style> Pattern overlay to add a minimal pattern to the shape.
Step 11:
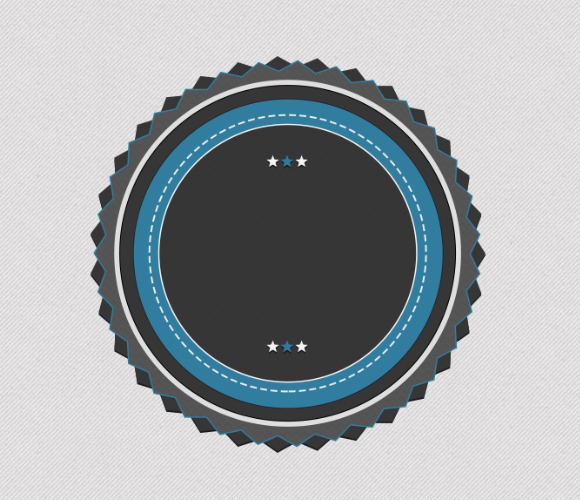
Create a new layer and select the ‘Pen Tool’ with Tool mode changed to ‘Shape’. Now create a star shape and fill it with color # f4f4f4. Select the star layer and click on Layer style to add ‘Drop shadow’.
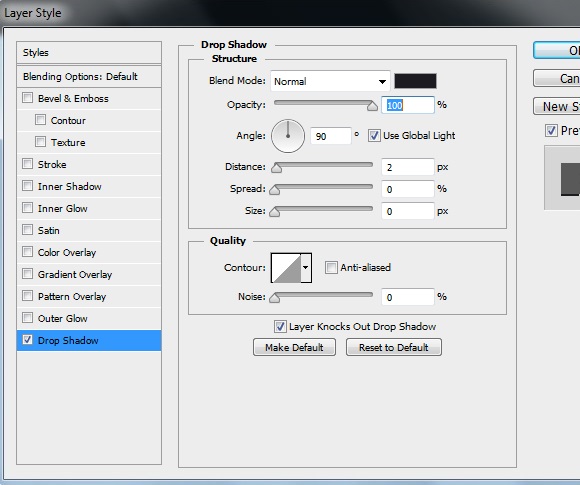
Now right-click on the star layer and select ‘Duplicate Layer’. Same way create some more stars and fill the middle ones with color # 317d9f and rest of them with # f4f4f4.
Step 12:
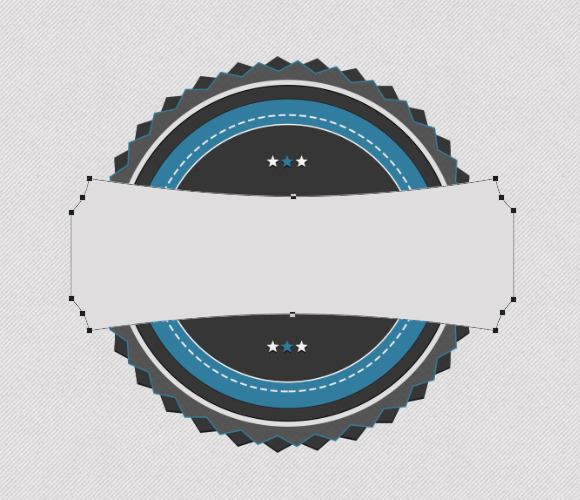
Select the ‘Pen Tool’ and create a simple shape. Fill the shape with color # dfdede.
Step 13:
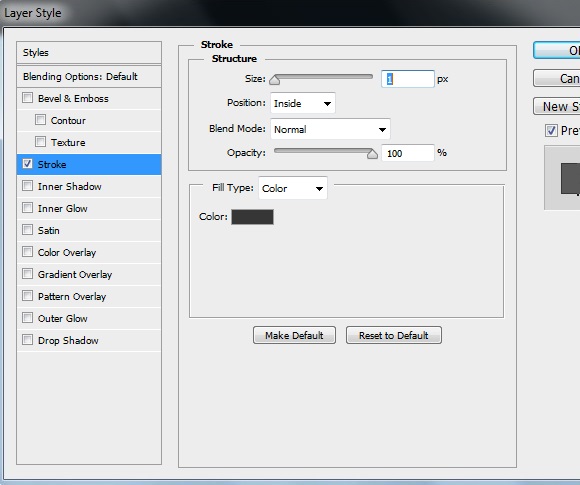
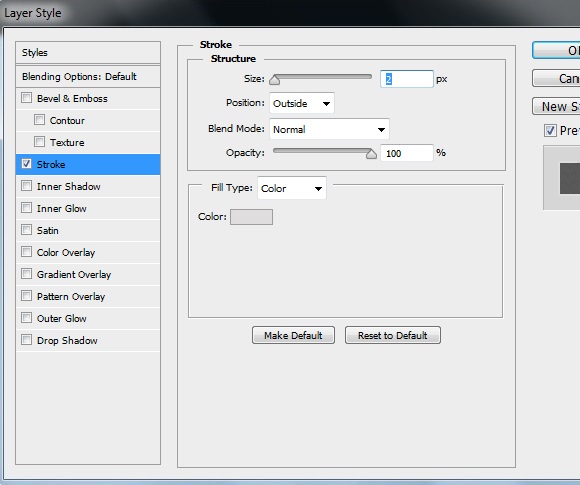
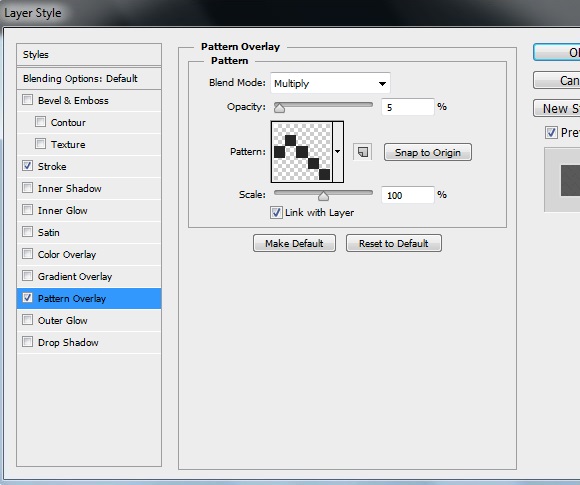
Select the above shape and click on Layer Style to add Stroke and Pattern. Keep the settings for these same as shown in the images below.
Step 14:
Duplicate the layer we have created above (right-click on the star layer and select ‘Duplicate Layer’) and reduce the size by using Edit> Free Transform. Fill this shape with color # 307a9c.

Step 15:
Create a new layer, then select the ‘Pen Tool’ and create a ribbon shape. Fill the shape with color # 414040.

Step 16:
Select the Ribbon layer and click on Layer style to add Stroke and Pattern with the same settings as shown in the following images.
Step 17:
Now select the ‘Type Tool’ to add the title text with color # f6f6f6. Then click on Layer style to add drop shadow to the text.
Our retro badge is ready let’s have a look at our final result:

That’s it for now, We’ll be back with some more interesting and useful tutorials. Till then have fun!
