
Setting up email through Mac Mail is straight forward and easier than even Outlook. Here’s a quick tutorial on how to use the email settings you find in your hosting account cpanel (in this case we’re using Hostgator).
First, login to your Hostgator cpanel and either create an email account, or if you have an existing email you’d like to set up, select the mail icon, and then hover over the more button and click configure email client.

This gives you your email settings, which we’ll be using to manually configure Mac Mail. There is a auto configuration option here as well, which sometimes works like a charm. Feel free to give it a try.
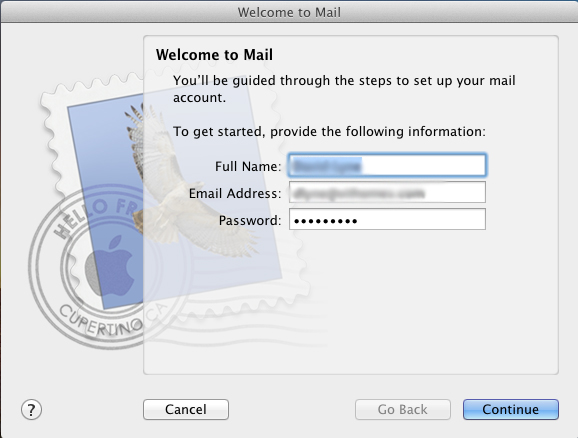
Now open the Mac Mail app from your applications menu on your mac. You’ll get the following welcome screen, and go ahead and enter your name, email address, and the password you used when you created the email account.
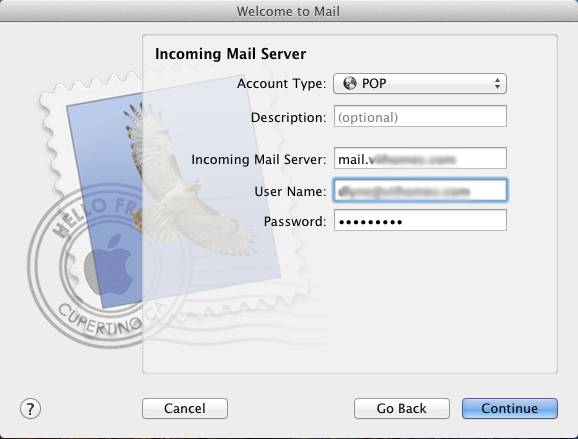
Next, enter your server information. For Hostgator, non SSL settings for the incoming mail server will be mail.yourdomain.com. For SSL settings, you’ll need to look at the settings in your cpanel email configuration area that we accessed previously. Your user name is actually you complete email address, such as name@youdomain.com.
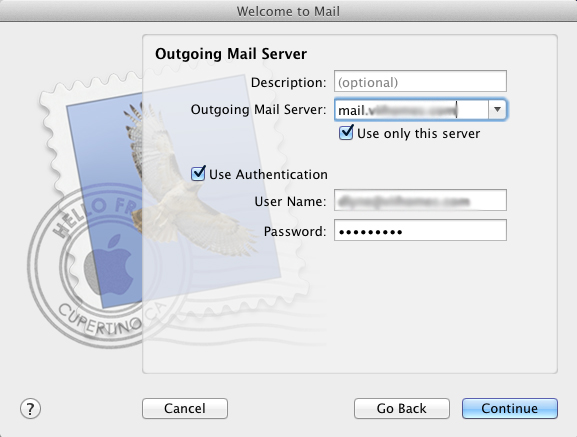
Next, you’ll set up the outgoing mail server, which is just the same as the incoming for non SSL Hostgator settings. And again the user name is your email address.
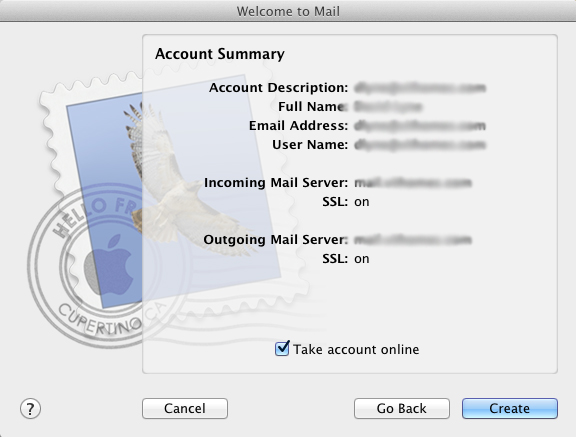
Lastly, you end up at the Mac Mail account summary page. Mac Mail might give you a popup about verifying the server information. In that case, click continue. The Mac Mail summary page will look as follows.
Setting up your Hostgator email to run through Mac Mail is very straight forward and a great small business solution. If you’d like to use the secure settings (recommended) just replace the fields given by Hostgator throughout the Mac Mail email setup process.